
In higher education AV, the microphone is one of the most underestimated tools in the signal chain. Mic selection—especially the polar pattern—can make or break intelligibility, engagement, and even the success of a recorded lecture or hybrid class. I’ve been surprised by the number of AV professionals who don’t understand the differences in mic polar patterns and when to use them.
Let’s clear the static: not all microphones are created equal. Understanding polar patterns isn’t just for broadcast engineers or touring audio techs—it’s vital for AV pros. Whether you’re supporting lectures, events, podcasts, performances, or hybrid learning, the right microphone polar pattern can make or break the sound quality.
What Is a Polar Pattern?
A microphone’s polar pattern describes its sensitivity to sound from different directions. Think of it like a 2D heatmap around the mic capsule. It tells you where the mic “hears” best and where it naturally rejects sound. This matters when you’re trying to capture a single voice in a noisy classroom—or several voices at a roundtable without picking up HVAC rumble or projector fan noise.
Let’s break down the major types:
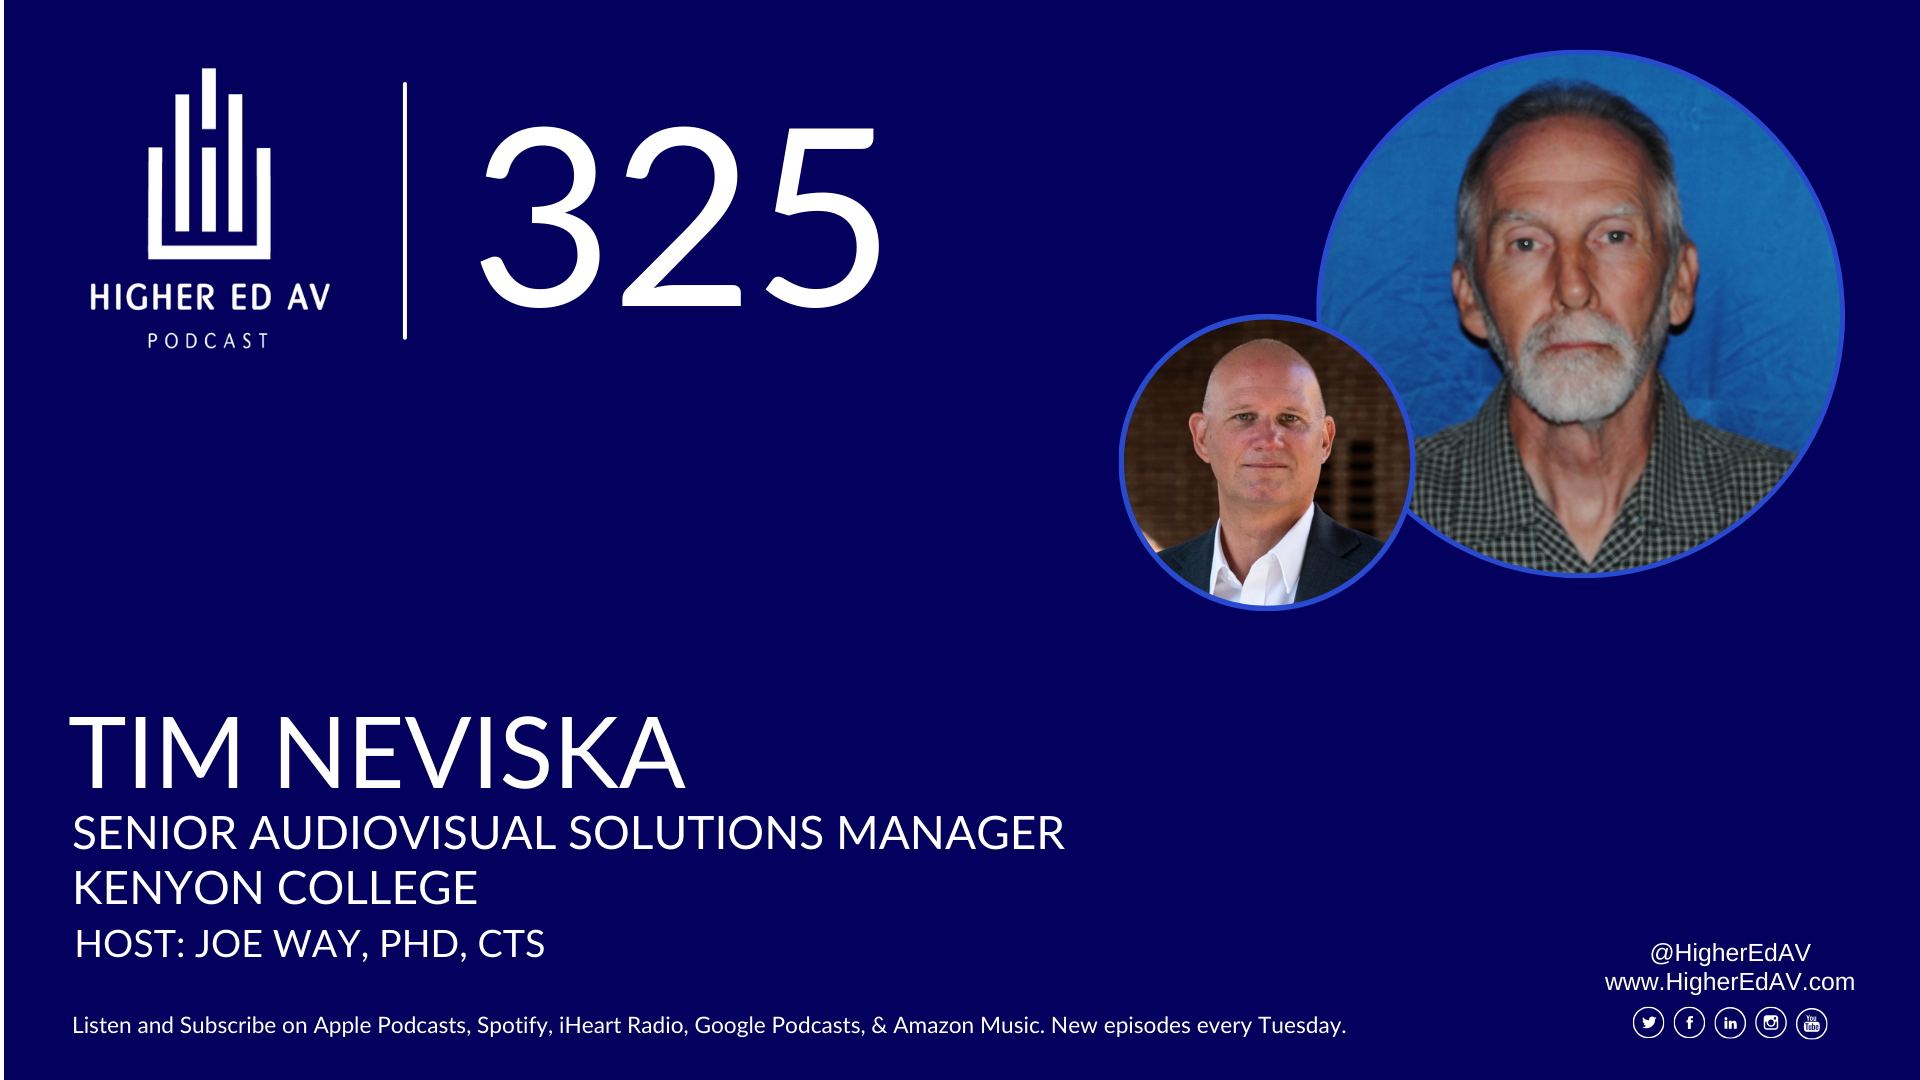
Omnidirectional
- Pickup: Equally sensitive to sound from all directions
- Best for: Lapel mics (lavaliers) worn close to the mouth
- Avoid if: There’s ambient noise or loudspeakers nearby (feedback risk!)
Higher Ed Use Case:
Ideal for faculty lav mics during lecture capture. If the mic is clipped near the speaker’s mouth, room noise is less of an issue, and the natural sound is full and clear. Bonus: the professor can turn their head without “falling off mic.”
Pro Tip:
Train instructors and performers on mic placement, not just clip location—positioning too far from the mouth picks up too much room.

Cardioid
- Pickup: Most sensitive at the front, less at the sides, and least at the rear
- Best for: Podiums, handheld mics, podcasting, instrument miking
- Avoid if: The user tends to speak from the side or moves a lot
Higher Ed Use Case:
Perfect for podiums and lecterns where the instructor remains relatively stationary. Cardioid mics help reject projector fan noise from behind and limit pickup of rustling paper or students whispering nearby.
Pro Tip:
Use cardioid patterns for focused applications—the best sound is straight-on. Remind users: “Talk into the logo.”
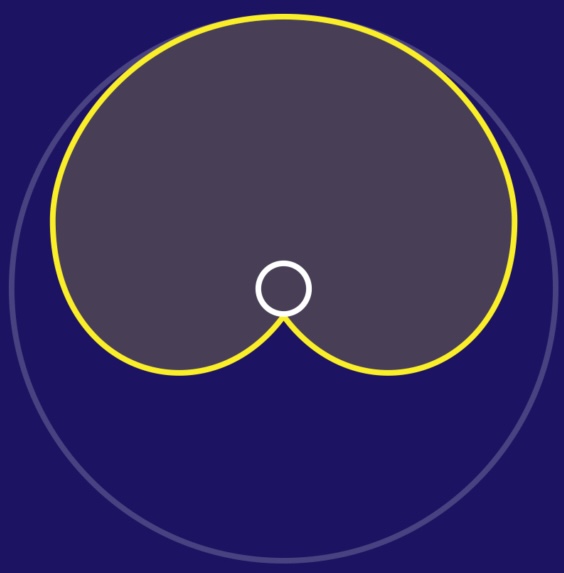
Supercardioid / Hypercardioid
- Pickup: Tighter front focus than cardioid, with some rear pickup
- Best for: Noisy environments where focused pickup is essential
- Avoid if: Rear noise sources (like monitors or noisy gear) are present
Higher Ed Use Case:
A good fit for panel discussions or table mics in noisy rooms. Hypercardioids can isolate individual voices in a row of speakers, especially when paired with DSP gating or auto-mixing.
Pro Tip:
These work best in controlled environments—they reject more side noise than cardioids, but require careful positioning. Use auto-mixers or DSP gating for best results.
Lobar (Shotgun)
- Pickup: Very narrow front-focused pattern, excellent off-axis rejection
- Best for: Video shoots, large lecture capture, distance miking
- Avoid if: The speaker moves side to side frequently
Higher Ed Use Case:
Ideal for ceiling-mounted mics in lecture halls or studios, where mobility is limited and a boom isn’t practical. Shotgun mics can isolate a single speaker from a distance, but positioning is critical—misalignment leads to unusable audio.
Pro Tip:
Perfect when you can’t get close to the speaker. But remember—miss the beam, miss the voice.
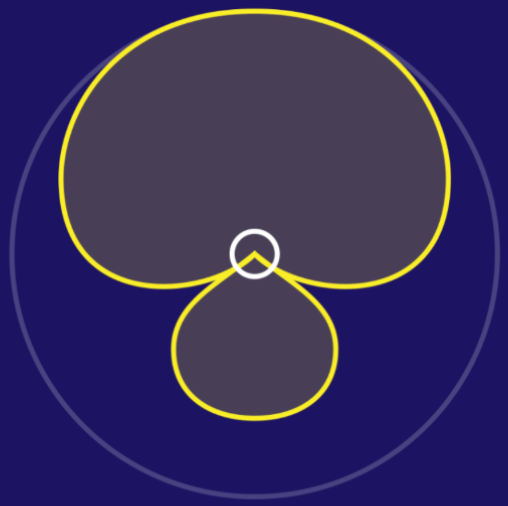
Bidirectional
- Pickup: Equal sensitivity front and back, rejection at sides
- Best for: Two-person interviews, side-by-side setups
- Avoid if: Side noise is prominent
Higher Ed Use Case:
Rare in classrooms, but great for podcasts or faculty interviews where two people face each other. Figure-8 mics also shine in stereo miking techniques if you’re producing music or arts programming on campus.
Pro Tip:
Figure-8 is a specialty pattern. Place the mic centrally between the two speakers and angle the null points (the mic’s sides) toward noise sources like fans or nearby conversations. For crisp recordings, keep both speakers the same distance from the mic and in line with its front and back lobes.

Choosing the right polar pattern isn’t just a technical detail—it’s a strategic decision. AV pros in higher ed are often balancing:
- Room acoustics (reflective vs. treated)
- Ambient noise (HVAC, projectors, students)
- Mobility of the speaker (fixed vs. roaming)
- Feedback potential (especially in rooms with speakers)
Don’t let polar pattern selection be an afterthought. Instead, make it part of your design playbook and user training strategy. A well-matched mic and pattern can make an average room sound great—and a great room sound even better.